East End Arts Council

Screen Printing for Beginners: A Step-by-Step Introduction to the Process

Screen printing has a certain magic to it. You start with a design, prepare a screen, add ink, pull a squeegee across the surface, and suddenly that image appears on paper or fabric.

Once you understand the basic process, screen printing becomes an incredibly versatile way to create everything from art prints and posters to T-shirts, tote bags, and mixed-media work.

For anyone exploring screen printing for beginners, the process can initially look more complicated than it really is. Like many printmaking techniques, it becomes much easier when you understand what each tool does and work through the steps in the right order.

What Is Screen Printing?

Screen printing is a printmaking technique in which ink is pushed through a fine mesh screen onto a surface. A stencil blocks portions of the mesh, allowing ink to pass through only where you want the image to appear.

The basic principle is simple:

  • Open areas of the screen allow ink through.
  • Blocked areas prevent ink from reaching the printing surface.
  • A squeegee pushes the ink evenly across the screen.
  • The resulting image can be repeated multiple times.

That ability to create multiple original prints is one of the qualities that makes printmaking so appealing.

What Do You Need for Screen Printing?

You do not need an enormous collection of supplies to understand screen printing for beginners, but several tools are essential.

The Screen and Stencil

The screen consists of fine mesh stretched tightly across a frame. Your stencil determines which areas of the mesh remain open for ink.

Stencils can be created in several ways. Simple projects may use cut paper or stencil film, while more advanced screen printing often uses photo emulsion and a light source to transfer detailed artwork onto the screen.

Ink, Squeegee, and Printing Surface

You will also need screen-printing ink and a squeegee. The squeegee has a rubber blade that pushes ink across the mesh.

Your printing surface, also called the substrate, might be:

  • Paper
  • Cardboard
  • Fabric
  • T-shirts
  • Tote bags
  • Other flat, printable materials

Different inks are designed for different surfaces, so always match the ink to the material you plan to print.

The Screen Printing Process Step by Step

Understanding the order of operations makes the entire process much more manageable.

Step 1: Create Your Design

Start with a relatively simple image, especially for your first project. Bold shapes, strong lines, lettering, and high-contrast designs generally translate well to screen printing.

If you are struggling to decide what to create, try a few creative exercises for artists before committing to your final image.

Remember that each ink color traditionally requires its own stencil or screen. A one-color design is therefore an excellent starting point.

Step 2: Prepare the Stencil

Next, transfer your design onto the screen.

With photo emulsion, the screen is coated with a light-sensitive emulsion and allowed to dry. Artwork printed on transparent film is placed over the coated screen before it is exposed to light.

The areas exposed to light harden. The protected areas remain washable, creating openings in the mesh through which ink can pass.

Step 3: Position Your Printing Surface

Place your paper or fabric on a clean, flat surface and carefully position the screen.

Alignment becomes especially important when producing several copies. Marking the corners of your paper or creating simple registration guides can help you place each piece consistently.

For fabric, make sure the material is smooth and secure before printing.

Step 4: Add Ink and Pull the Print

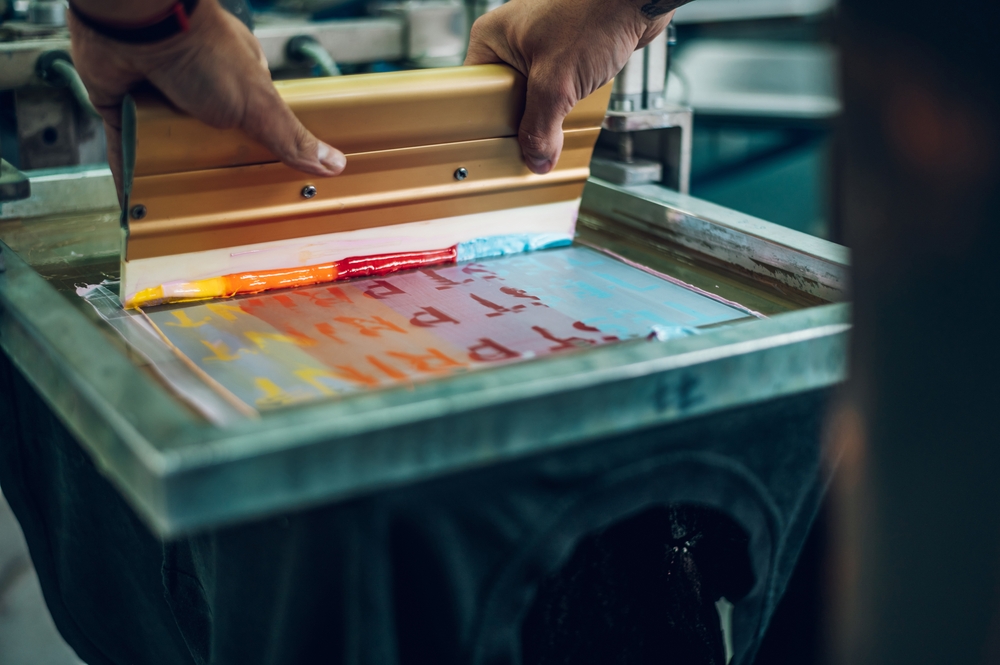
Place ink along one edge of the screen. Holding the squeegee firmly, pull the ink across the image while applying consistent pressure.

The goal is to force enough ink through the open mesh to produce a solid impression without flooding the design.

Then lift the screen carefully.

This is usually the most satisfying part of the entire process: seeing the finished image underneath for the first time.

Step 5: Dry or Cure the Ink

A print that looks dry is not necessarily ready for use.

Paper prints generally need adequate drying time. Textile inks may need to be heat-cured according to the ink manufacturer’s instructions so the design will withstand handling and washing.

Always check the requirements for the particular ink you are using.

Step 6: Clean Your Screen

Clean the screen as soon as practical after printing. Dried ink can clog the mesh and make the screen difficult to reuse.

Remove excess ink first, then clean the mesh using products appropriate for your ink and screen.

Good cleanup habits become especially important as you begin producing more prints.

Common Screen Printing Mistakes Beginners Make

A few problems appear frequently when learning screen printing.

Using Too Much or Too Little Pressure

Too little pressure may create faded or incomplete prints. Excessive pressure can push too much ink through the screen or distort fine details.

Aim for one smooth, confident pull rather than repeatedly working the same area.

Moving the Screen Between Prints

Even slight movement can cause blurred edges or problems with registration.

Create a repeatable setup before beginning a print run rather than repositioning everything by eye each time.

Starting With an Overly Complicated Design

Detailed, multicolor images introduce additional challenges such as registration, ink layering, and separate screens.

Beginning with one color allows you to concentrate on the fundamentals before adding complexity.

Where Can Screen Printing Take Your Art?

Once you are comfortable with the basics, screen printing opens up a much larger creative world.

You can experiment with layered colors, transparent inks, repeating patterns, unusual surfaces, mixed media, and combinations of screen printing with other techniques.

Seeing what other printmakers are creating can also help expand your ideas. Our The Print Continuum juried exhibition celebrates printmaking across traditional and experimental processes, including screen printing, linocut, etching, monotype, and hybrid approaches.

Learn Screen Printing and Printmaking at East End Arts Council

You can learn a lot from reading about screen printing for beginners, but printmaking is particularly rewarding when you can work directly with the materials.

At East End Arts Council, our Printmaking Workshops provide hands-on opportunities to explore the complete printmaking process. Our Printmaking Intensive introduces techniques including linocut relief printing, etching, and screen printing on both paper and fabric.

Learning in a studio also gives you the opportunity to experiment, ask questions, see techniques demonstrated, and understand why a print behaves differently from one attempt to the next.

You can explore our current offerings through the East End Arts Council Class Calendar. Members who want additional time to keep creating can also explore our Member Open Studio, where artists can work independently alongside a community of fellow creatives.

Screen printing rewards curiosity and experimentation. Your first print may not be perfect, and it does not need to be. Learn the process, make adjustments, pull another print, and see where the medium takes you.

Screen Printing for Beginners: A Step-by-Step Introduction to the Process

Screen printing has a certain magic to it. You start with a design, prepare a screen, add ink, pull a squeegee across the surface, and suddenly that image appears on paper or fabric.

Once you understand the basic process, screen printing becomes an incredibly versatile way to create everything from art prints and posters to T-shirts, tote bags, and mixed-media work.

For anyone exploring screen printing for beginners, the process can initially look more complicated than it really is. Like many printmaking techniques, it becomes much easier when you understand what each tool does and work through the steps in the right order.

What Is Screen Printing?

Screen printing is a printmaking technique in which ink is pushed through a fine mesh screen onto a surface. A stencil blocks portions of the mesh, allowing ink to pass through only where you want the image to appear.

The basic principle is simple:

  • Open areas of the screen allow ink through.
  • Blocked areas prevent ink from reaching the printing surface.
  • A squeegee pushes the ink evenly across the screen.
  • The resulting image can be repeated multiple times.

That ability to create multiple original prints is one of the qualities that makes printmaking so appealing.

What Do You Need for Screen Printing?

You do not need an enormous collection of supplies to understand screen printing for beginners, but several tools are essential.

The Screen and Stencil

The screen consists of fine mesh stretched tightly across a frame. Your stencil determines which areas of the mesh remain open for ink.

Stencils can be created in several ways. Simple projects may use cut paper or stencil film, while more advanced screen printing often uses photo emulsion and a light source to transfer detailed artwork onto the screen.

Ink, Squeegee, and Printing Surface

You will also need screen-printing ink and a squeegee. The squeegee has a rubber blade that pushes ink across the mesh.

Your printing surface, also called the substrate, might be:

  • Paper
  • Cardboard
  • Fabric
  • T-shirts
  • Tote bags
  • Other flat, printable materials

Different inks are designed for different surfaces, so always match the ink to the material you plan to print.

The Screen Printing Process Step by Step

Understanding the order of operations makes the entire process much more manageable.

Step 1: Create Your Design

Start with a relatively simple image, especially for your first project. Bold shapes, strong lines, lettering, and high-contrast designs generally translate well to screen printing.

If you are struggling to decide what to create, try a few creative exercises for artists before committing to your final image.

Remember that each ink color traditionally requires its own stencil or screen. A one-color design is therefore an excellent starting point.

Step 2: Prepare the Stencil

Next, transfer your design onto the screen.

With photo emulsion, the screen is coated with a light-sensitive emulsion and allowed to dry. Artwork printed on transparent film is placed over the coated screen before it is exposed to light.

The areas exposed to light harden. The protected areas remain washable, creating openings in the mesh through which ink can pass.

Step 3: Position Your Printing Surface

Place your paper or fabric on a clean, flat surface and carefully position the screen.

Alignment becomes especially important when producing several copies. Marking the corners of your paper or creating simple registration guides can help you place each piece consistently.

For fabric, make sure the material is smooth and secure before printing.

Step 4: Add Ink and Pull the Print

Place ink along one edge of the screen. Holding the squeegee firmly, pull the ink across the image while applying consistent pressure.

The goal is to force enough ink through the open mesh to produce a solid impression without flooding the design.

Then lift the screen carefully.

This is usually the most satisfying part of the entire process: seeing the finished image underneath for the first time.

Step 5: Dry or Cure the Ink

A print that looks dry is not necessarily ready for use.

Paper prints generally need adequate drying time. Textile inks may need to be heat-cured according to the ink manufacturer’s instructions so the design will withstand handling and washing.

Always check the requirements for the particular ink you are using.

Step 6: Clean Your Screen

Clean the screen as soon as practical after printing. Dried ink can clog the mesh and make the screen difficult to reuse.

Remove excess ink first, then clean the mesh using products appropriate for your ink and screen.

Good cleanup habits become especially important as you begin producing more prints.

Common Screen Printing Mistakes Beginners Make

A few problems appear frequently when learning screen printing.

Using Too Much or Too Little Pressure

Too little pressure may create faded or incomplete prints. Excessive pressure can push too much ink through the screen or distort fine details.

Aim for one smooth, confident pull rather than repeatedly working the same area.

Moving the Screen Between Prints

Even slight movement can cause blurred edges or problems with registration.

Create a repeatable setup before beginning a print run rather than repositioning everything by eye each time.

Starting With an Overly Complicated Design

Detailed, multicolor images introduce additional challenges such as registration, ink layering, and separate screens.

Beginning with one color allows you to concentrate on the fundamentals before adding complexity.

Where Can Screen Printing Take Your Art?

Once you are comfortable with the basics, screen printing opens up a much larger creative world.

You can experiment with layered colors, transparent inks, repeating patterns, unusual surfaces, mixed media, and combinations of screen printing with other techniques.

Seeing what other printmakers are creating can also help expand your ideas. Our The Print Continuum juried exhibition celebrates printmaking across traditional and experimental processes, including screen printing, linocut, etching, monotype, and hybrid approaches.

Learn Screen Printing and Printmaking at East End Arts Council

You can learn a lot from reading about screen printing for beginners, but printmaking is particularly rewarding when you can work directly with the materials.

At East End Arts Council, our Printmaking Workshops provide hands-on opportunities to explore the complete printmaking process. Our Printmaking Intensive introduces techniques including linocut relief printing, etching, and screen printing on both paper and fabric.

Learning in a studio also gives you the opportunity to experiment, ask questions, see techniques demonstrated, and understand why a print behaves differently from one attempt to the next.

You can explore our current offerings through the East End Arts Council Class Calendar. Members who want additional time to keep creating can also explore our Member Open Studio, where artists can work independently alongside a community of fellow creatives.

Screen printing rewards curiosity and experimentation. Your first print may not be perfect, and it does not need to be. Learn the process, make adjustments, pull another print, and see where the medium takes you.

Support Us

Become A Member

Partner With Us